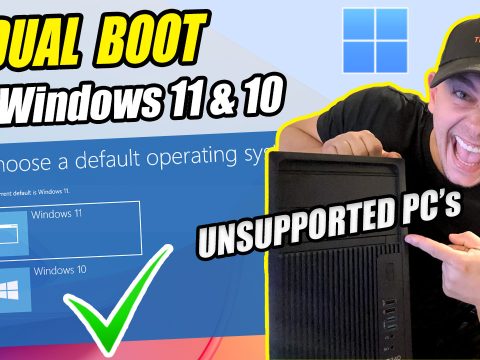
If you own an older PC, such as a Dell Optiplex with a Core 2 Duo or Core 2 Quad processor, and you’ve struggled to install Windows 11, this guide is for you. Many older processors do not support SSE 4.2 and POPCNT instructions, which are required for the latest versions of Windows 11. However, with a few tweaks, you can still run a version of Windows 11 on your legacy hardware. In this comprehensive guide, I’ll walk you through the process step-by-step, as demonstrated in my video tutorial, ensuring you have all the tools and knowledge you need to breathe new life into your aging system.
Video Walkthrough
Step 1: System Overview
- Computer Used: Dell Optiplex 780 with a Core 2 Duo E7500 processor, 8GB of RAM, and Windows 10 Pro installed.
- Problem: The processor supports SSE 4.1 but not SSE 4.2, making it incompatible with Windows 11 24H2.
This system, while outdated, serves as a great example of how older hardware can still be utilized effectively. Understanding the limitations of your processor is crucial before proceeding, and I’ll guide you through identifying these issues.
Step 2: Upgrade Your Hardware
To improve performance and compatibility:
- Upgrade the processor: Replace it with a Core 2 Quad, which is the most advanced option for this motherboard. The additional cores and improved performance will make a noticeable difference.
- Increase RAM: Expand the memory from 8GB to 16GB to handle modern applications more efficiently.
- Replace the HDD with an SSD: Installing an SSD will dramatically improve boot times and application loading speeds.
These upgrades can be done on a budget, with parts often costing less than $50. By investing in these improvements, you can maximize the potential of your older PC.
Installing Windows 11
Step 1: Identify Processor Limitations
- Search for your CPU model online to determine the supported instruction sets.
- Confirm that your processor lacks SSE 4.2, as this will dictate which version of Windows 11 can be installed.
Knowing your CPU’s capabilities is essential to selecting the right version of Windows 11 and ensuring a smooth installation process.
Step 2: Download Windows 11 23H2
- Visit the Microsoft website and download the Media Creation Tool.
- Use the tool to create a Windows 11 ISO file, ensuring you select version 23H2, which is better suited for older hardware.
This version is optimized for systems that do not meet the strict requirements of newer updates like 24H2.
Step 3: Prepare the ISO
- Use 7-Zip to extract the ISO contents to your desktop for easier access.
- Navigate to the
sourcesfolder and locate thesetup.exefile, which will be used to initiate the installation.
Step 4: Bypass Compatibility Checks
- Open Command Prompt as Administrator to ensure you have the necessary permissions.
- Navigate to the extracted folder using the
cdcommand. - Run the setup file using
setupprep.exeto start the installation process without triggering compatibility errors.
This method allows you to bypass requirements such as TPM 2.0 and secure boot, making it possible to install Windows 11 on unsupported hardware.
Performing a Clean Install
Step 1: Create a Bootable USB Drive
- Download Rufus (version 4.6 or later) to prepare your installation media.
- Select the Windows 11 ISO and create a bootable USB drive.
- Enable options to:
- Remove TPM 2.0 and Secure Boot requirements.
- Create a local account instead of requiring a Microsoft account.
Using Rufus ensures that your installation media is configured correctly for legacy hardware.
Step 2: Configure BIOS
- Boot into BIOS (use
F2,Delete, orF12depending on your PC model). - Enable Legacy Mode if required for your motherboard.
- Adjust the boot order to prioritize the USB drive, ensuring the system boots into the installer.
Step 3: Install Windows 11
- Boot from the USB drive and begin the installation process.
- Follow the prompts to delete existing partitions (if necessary) and perform a clean install.
- Allow the installation to complete without interruptions.
A clean install ensures the best performance and removes any residual files or software that could slow down your system.
Post-Installation Tweaks
- Upgrade your processor to a Core 2 Quad if you haven’t already done so. This will significantly enhance multitasking capabilities.
- Verify your Windows version by navigating to Settings → About and confirming it’s 23H2.
- Check for updates regularly to ensure you have the latest security patches and system improvements.
These tweaks will help you maintain a stable and efficient system for daily use.
Tips for Better Performance
- Replace your HDD with an SSD: This is the single most impactful upgrade for an older system.
- Consider an M.2 NVMe SSD: If your motherboard supports it, use an adapter to install an NVMe SSD for even faster speeds.
- Use a clean version of Windows 11: Incorporate an “unattended.xml” file during installation to remove unnecessary software and bloatware, streamlining your system.
These tips ensure your PC runs as efficiently as possible, even with older hardware.
Conclusion
By following these detailed steps, you can successfully install and run Windows 11 on older PCs that lack SSE 4.2 and POPCNT support. While version 23H2 may not be the latest, it provides excellent performance and compatibility for legacy systems. Additionally, upgrading your hardware and following optimization tips will further enhance your experience. Watch my full video tutorial for an in-depth walkthrough and additional insights.
Related Tutorials
For more tutorials and updates, subscribe to my channel, join the community discussions, and stay informed on the latest tech solutions.


