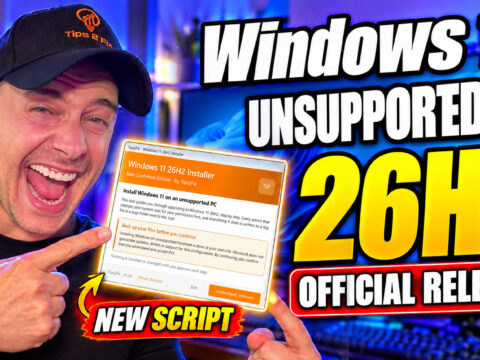
Windows 11 26H2 is not officially released yet but you can install it today. Microsoft has published Windows 11 26H2 as an Insider Preview build 26300.8935 in the experimental channel, delivered as an enablement package on top of version 25H2. The stable public release is expected around September or October 2026. In this guide (and the video tutorial below), I show you two methods to install Windows 11 26H2 right now — on a fully supported PC and on an unsupported PC — step by step, on real hardware, including every error you might hit and exactly how to fix it.
What is Windows 11 26H2 (build 26300)?
Windows 11 version 26H2 is the next feature update after 25H2. Right now it is available only inside the Windows Insider Program, in the experimental (preview) channel, as Insider Preview build 26300.8935.
Here is the detail that confuses everyone: when you go to download the ISO, you will not see “26H2” in the list. You will see build 26300 labeled as 25H2. That is not a mistake. Windows 11 version 26H2 shares the same servicing branch as version 25H2, and the update is implemented through an enablement package on build 26300. So the rule is simple: build 26300 = Windows 11 26H2. Download that one.
Requirements: what “ANY PC” really means (SSE 4.2 & POPCNT)
When I say you can install 26H2 on “any PC,” there is one hard limit that no bypass can fix. Starting with the 24H2 servicing family, Windows 11 requires a processor that supports the SSE 4.2 and POPCNT instructions. This is a hardware-level requirement:
- Your CPU supports SSE 4.2 and POPCNT, but is on Microsoft’s “unsupported” list (older Intel/AMD generations, no TPM 2.0, etc.) → ✅ You CAN install 26H2 using the bypass method in this guide.
- Your CPU does NOT support SSE 4.2 (for example, Intel Core 2 Duo and similar very old processors) → ❌ 26H2 will not boot, no matter what you do. For those computers, watch my dedicated video on which Windows version you should install instead: Windows for CPUs without SSE 4.2.
Not sure where your PC stands? Download PC Health Check and run it: Download PC Health Check. If it says only “The processor isn’t currently supported,” you are in the first (fixable) category.
Before you install: read this first
⚠️ Windows 11 26H2 build 26300 is an experimental Insider Preview build. It is not the final, stable release. Before installing:
- Back up your computer. Ideally, test in a virtual machine or on a secondary PC first. In my video I install it directly on my main work machine so you can see a real-world upgrade — but that is a risk I chose to take for the tutorial.
- Do not change your Insider channel afterwards. Once enrolled, stay on your channel until the stable release.
- Snapdragon/ARM note: if your device is on Windows 11 26H1, you will NOT receive 26H2. 26H1 is a separate release for different processors and follows its own servicing branch. Do not switch channels trying to force it.
Method 1: Install 26H2 via the Windows Insider Program (fastest method)
This is the easiest and fastest method — but it requires your Windows 11 to be set up with a Microsoft account. If you use a local (offline) account and don’t want a Microsoft account, skip to Method 2.
- Open Settings → Windows Update → Windows Insider Program.
- If the option is greyed out, first enable optional diagnostic data: Settings → Privacy & security → Diagnostics & feedback → turn on “Send optional diagnostic data.”
- Click Get started → Link an account and sign in with your Microsoft account. Accept the preview agreements.
- Select the experimental (preview) channel and restart your PC to finish enrollment.
- Go back to Windows Update → Check for updates. You will see: Windows 11 Insider Preview 26300.8935 — feature update.
- Click Download & install. After the restart, open Settings → System → About (or run
winver) and you will be on version 26H2.
Method 2: Manual installation with the official ISO or UUP dump
Use this method if you have a local account, don’t want to enroll this PC in the Insider Program, or simply want the ISO file for later.
Option A: Official Microsoft Insider Preview ISO
- Go to the official download page: Windows Insider Preview ISO Microsoft and sign in with a Microsoft account.
- Under Select edition, scroll down and find: Windows 11 Insider Preview (Experimental Channel) — Build 26300.8935 (25H2). Remember: it says 25H2, but build 26300 IS 26H2 (enablement package — see above).
- Choose your language — this step is critical, see the language section below.
- Confirm and download the ISO.
Option B: UUP dump (no Microsoft account needed)
UUP dump is safe to use for this because it downloads the update files directly from Microsoft’s own servers and builds the ISO locally on your PC.
- On uupdump.net, open the Dev Channel section and find Windows 11 Insider Preview 26300.8935 (amd64). Make sure you pick the amd64 build for Intel/AMD PCs.
- Select your language (same rule — match your installed Windows language).
- Untick editions you don’t need (I keep only Windows Pro), then choose “Download and convert to ISO” and click Create download package.
- Extract the downloaded ZIP into a folder, then double-click uup_download_windows.cmd. When prompted, type
r(run) and press Enter. - The script downloads everything from Microsoft servers (roughly 30 minutes depending on your connection) and produces the finished ISO file in the same folder.
Installing from the ISO (upgrade, keep files & apps)
- Right-click the ISO → Mount.
- Open the mounted drive and double-click setup.exe.
- On the first screen, click “Change how Setup downloads updates” and select Not right now (faster, and avoids surprises during a preview install).
- Click Next, accept the license terms, and confirm “Keep personal files and apps.”
- Click Install. The PC will restart a few times. When it comes back, run
winver— you are on Windows 11 26H2.
How to check your Windows language (important!)
If the ISO language does not match your currently installed Windows language, the “Keep personal files and apps” option will be greyed out and Setup will only offer a clean install. To check your exact system language, open Command Prompt as administrator and run:
dism /online /get-intlLook at “Default system UI language”. For example, mine shows en-US, so I must download the English (United States) ISO. If you are in Canada, the UK, or another English-speaking country and it shows en-GB or similar, choose English (International) instead.
FIX: “We couldn’t update the system reserved partition”
Right after clicking Next in Setup, you may hit this classic upgrade error: “We couldn’t update the system reserved partition.” It happens because the EFI System Partition is full — usually old font files taking up the little space Windows needs for the upgrade. Here is the fix (UEFI/GPT systems):
- Close Setup. Open Command Prompt as administrator — this is mandatory. If you later see “Access is denied,” your CMD is not elevated. (Start → type
cmd→ right-click → Run as administrator.) - Mount the EFI System Partition to the letter Y:
mountvol Y: /s - Switch to it and go to the fonts folder:
Y:cd EFI\Microsoft\Boot\Fonts - Delete the font files (they are safe to delete — Windows recreates what it needs):
del *.*Type
Yand press Enter to confirm.
Now run Setup again from the mounted ISO — the error is gone and the upgrade continues normally. You can also copy these commands from the box above instead of typing them.
Enable flight signing for pre-release builds
During the upgrade, Setup may warn you: “You are trying to install a pre-release copy of Windows” and ask you to enable flight signing so your device trusts flight-signed (pre-release) builds. Click Enable, let the computer restart, then run Setup again. If the same message appears after the restart, enable flight signing once more and continue — after that, the installation proceeds normally with “Keep personal files and apps.”
Install Windows 11 26H2 on an UNSUPPORTED PC (processor isn’t supported)
On unsupported hardware, both methods will stop you with one of these messages:
- “This PC doesn’t currently meet Windows 11 system requirements”
- “The processor isn’t supported for this version of Windows”
As long as your CPU supports SSE 4.2 and POPCNT (see the requirements section), you can bypass this check. The bypass is a registry edit based on the method Microsoft itself documented for upgrading unsupported devices.
Step 1: Download and run the bypasser
- Download my requirements bypasser here: Download the Windows 11 Requirements Bypasser. It is a small registry file — no third-party software, nothing installed.
- Right-click the file → Run as administrator (or double-click and confirm the registry merge).
Method 2: Or you can Do it Manually: created registry keys
If you prefer to see exactly what it changes: it sets the value:
AllowUpgradesWithUnsupportedTPMOrCPU = 1 under HKEY_LOCAL_MACHINE\SYSTEM\Setup\MoSetup — the official Microsoft-documented registry key for upgrading on unsupported TPM/CPU configurations.
Create This Registry , open up new “notepad.text” and put this code inside Save it
2. rename the extension from .tex to .reg and hit enter.
Windows Registry Editor Version 5.00

; ============================================================
; Windows 11 Unsupported Hardware - Registry Bypass
; TPM / Secure Boot / RAM / Unsupported CPU Family
; ============================================================

; Upgrade bypass
[HKEY_LOCAL_MACHINE\SYSTEM\Setup\MoSetup]
"AllowUpgradesWithUnsupportedTPMOrCPU"=dword:00000001

; Windows Setup hardware checks
[HKEY_LOCAL_MACHINE\SYSTEM\Setup\LabConfig]
"BypassTPMCheck"=dword:00000001
"BypassSecureBootCheck"=dword:00000001
"BypassRAMCheck"=dword:00000001
Or you can download
Direct Download Registry Bypasser 2026Step 2: Retry the installation
- If you were using Method 1 (Windows Update): go back to Windows Update, click “Fix issues” on the error, and let it re-check your PC. The “getting a few more things ready” window closes after about two minutes — then the download resumes and the feature update installs normally.
- If you were using Method 2 (ISO): simply run setup.exe from the mounted ISO again. The requirements screen no longer blocks you — accept, choose Keep personal files and apps, and upgrade.
Windows.old and the 10-day rollback
After the upgrade, you will find a Windows.old folder on your C: drive. Do not delete it. That folder contains your previous installation (25H2), and it is what powers the “Go back” option in Settings → System → Recovery. You have 10 days to roll back before Windows deletes the folder automatically. If you delete Windows.old manually, the Go back button disappears immediately.
Want more than 10 days? I made a full tutorial on how to extend the rollback period: How to extend the 10-day rollback in Windows 11.
And if 26H2 feels slow on your machine, check my step-by-step guide: How to speed up Windows 11.
Frequently Asked Questions
Is Windows 11 26H2 officially released?
No. Windows 11 26H2 is currently available only as Insider Preview build 26300.8935 in the experimental channel. The stable release is expected around September–October 2026.
Why don’t I see 26H2 in the ISO download list?
Because 26H2 shares the same servicing branch as 25H2 and is delivered as an enablement package on build 26300. In the download list, look for build 26300.8935 — it is labeled 25H2, but that IS Windows 11 26H2.
Can I install Windows 11 26H2 on an unsupported PC?
Yes — if your CPU supports SSE 4.2 and POPCNT. Use the registry bypasser (AllowUpgradesWithUnsupportedTPMOrCPU) and retry the installation. CPUs without SSE 4.2, like the Intel Core 2 Duo, cannot run 26H2 at all.
Will I lose my files and apps when upgrading to 26H2?
No. Both methods support an in-place upgrade with “Keep personal files and apps” — as long as the ISO language matches your installed Windows language. If the option is greyed out, you downloaded the wrong language.
I’m on Windows 11 26H1 — will I get 26H2?
No. 26H1 is a separate release for different processors (Snapdragon/ARM devices) with its own servicing branch. Do not switch Insider channels expecting 26H2 — stay on your current version.
Is UUP dump safe for downloading Windows 11 26H2?
Yes. UUP dump does not host any files itself — it generates a script that downloads the update packages directly from Microsoft’s own servers and builds the ISO on your computer.
How do I go back to Windows 11 25H2?
Open Settings → System → Recovery → Go back. This works for 10 days after the upgrade, as long as the Windows.old folder still exists on your C: drive.
Did this guide help you install Windows 11 26H2? Let me know in the comments how it went on your PC — supported or unsupported — and subscribe to Tips2Fix on YouTube for more Windows tutorials. God bless you!